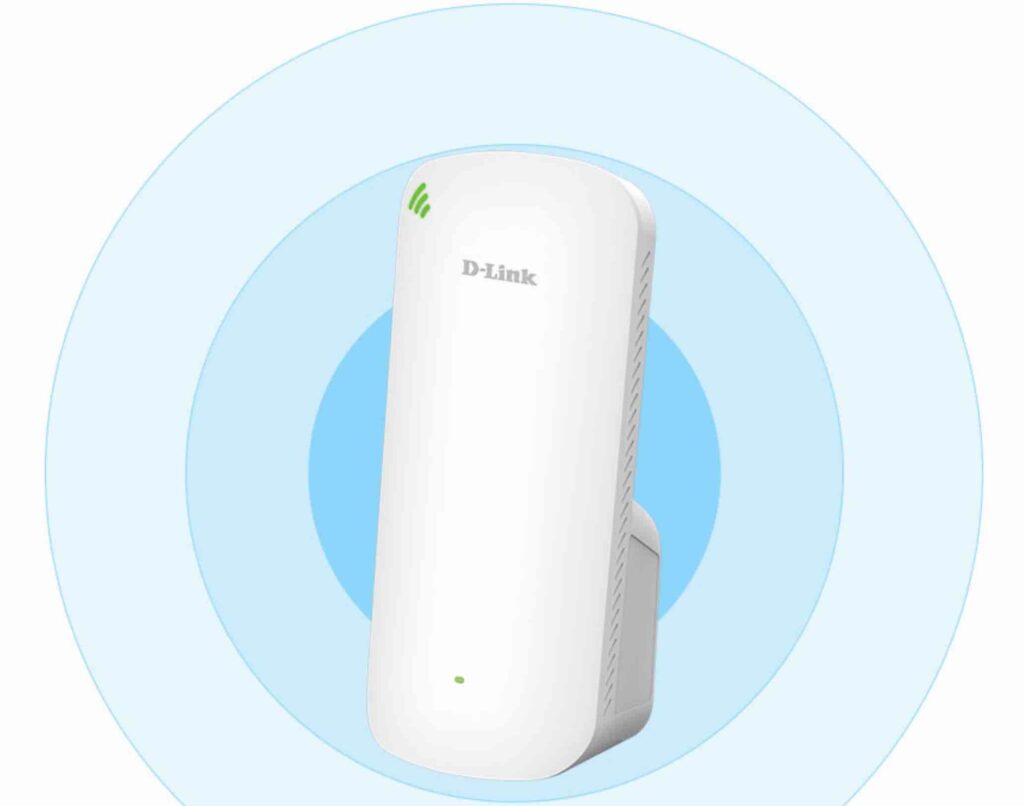
Dlinkap.local | D-Link Extender Login
Dlinkap.local redirects you to an IP address 192.168.0.50, In order to configure or login to any Dlink extender or Dlink Wireless Booster, you can use http://dlinkap.local or dlinkap.local as the default web address. Dlink Extenders are best known these days to cover dead zone areas of your Home or Business location, Dlink Extenders are just plugged and play devices, you just need to power ON your D-link device and press the WPS button on both the D-link extender as well as the host Access point.
Note: Dlinkap.local directs users to the IP address 192.168.0.50, To access Dlink extender GUI use address http://dlinkap.local or Dlink Wifi App. http://dlinkap.local directs to IP address of Dlink Extender 192.168.0.50, In case dlinkap.local is not working use default IP 192.168.0.50.
Dlink Extender Setup and Login
Are you having trouble getting a good Wi-Fi signal in certain areas of your home or office? A Dlink Extender can help extend the range of your wireless network, allowing you to enjoy a better connection in every room.
Setting up your Dlink Extender
Before you start setting up your Dlink Extender, make sure you have the following:
- A computer or mobile device with internet access
- Your existing wireless network name and password
- Your Dlink Extender
To set up your Dlink Extender:
- Plug in your Dlink Extender and wait for the power light to turn green.
- Connect your computer or mobile device to the Dlink Extender’s wireless network.
- Open a web browser and enter http://dlinkap.local or http://192.168.0.50 into the address bar.
- Follow the on-screen instructions to set up your Dlink Extender. Make sure to enter your existing wireless network name and password when prompted.
- Wait for your Dlink Extender to connect to your existing wireless network. This may take a few minutes.
- Once your Dlink Extender is connected, you can move it to a location where you need a better Wi-Fi signal.
Logging in to your Dlink Extender
To log in to your Dlink Extender and access its settings:
- Connect your computer or mobile device to the Dlink Extender’s wireless network.
- Open a web browser and enter http://dlinkap.local or http://192.168.0.50 into the address bar.
- Enter your Dlink Extender’s username and password. The default username is admin and the default password is blank. If you have changed these settings, enter the new username and password.
- Once you are logged in, you can access your Dlink Extender’s settings and make any necessary changes.
By following these steps, you can set up and log in to your Dlink Extender and enjoy a better Wi-Fi signal in every room of your home or office.
Boost Your Home Network with the D-Link Wi-Fi 6 Extender
If you’re tired of weak Wi-Fi signals and dead spots in your home, the D-Link Wi-Fi 6 Extender may be the solution you’ve been looking for. This powerful device uses the latest Wi-Fi 6 technology to deliver high-speed wireless internet to all corners of your house.
Faster Speeds, More Devices
With Wi-Fi 6 technology, the D-Link Wi-Fi 6 Extender can deliver speeds up to 3 times faster than previous generations of Wi-Fi. This means that you can stream ultra high-definition video, play online games, and download large files with ease. And with support for up to 40 devices, everyone in your home can connect at the same time without any lag or buffering.
Easy Setup and Management
Setting up the D-Link Wi-Fi 6 Extender is easy thanks to the D-Link Wi-Fi app and the intuitive web interface. You can use the app to set up and manage your network, check connected devices, and update firmware. And with the web interface, you can customize advanced settings to optimize your network performance.
Sleek and Compact Design
The D-Link Wi-Fi 6 Extender has a sleek and compact design that blends seamlessly into any home decor. Its small size allows you to place it anywhere in your home without taking up too much space. And with its built-in power-saving mode, it uses less energy than other extenders on the market.
Final Thoughts
Overall, the D-Link Wi-Fi 6 Extender is an excellent choice for anyone who wants to extend their home network with the latest technology. With its fast speeds, support for multiple devices, and easy setup and management, it’s a top performer that won’t disappoint.
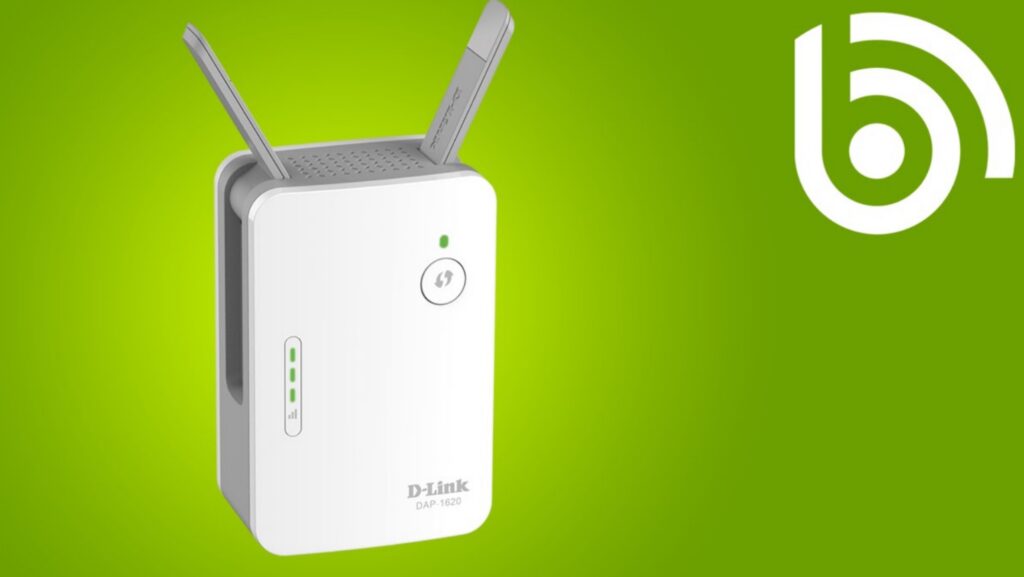
DLINK DAP- 1620 SET UP
To extend the reach of your Wi-Fi signal, either you have to set up the pesky cables all-around or consider setting up an extender. Every router has limits and can cover the home up to some extent. So, to fill your home with Wi-Fi, you have to set up an extender. Dlink DAP 1620 provides you an amazing coverage to remove all the dead spots from your location.
This extender directly plugs into the power outlet, giving you all comfort of a portable device. The WPS button provides an easy setup of the device to the router. At the bottom, there is an Ethernet port to connect a device that is not compatible with wireless connectivity. A reset hole is also at the bottom to set the extender to factory default settings. The extender needs to be rebooted or reset if a user forgot the admin details or have encountered any issue with the device.
Working of Dlink DAP-1620
This extender also works as other extenders do. It takes the signal from your router. So, it must be located within the range of your router. And then the signal is retransmitted to the area where there is no internet access. To get the highest coverage area from your extender, the placement of the extender really matters. Place it close enough to the router so that it can get a proper signal from the router. But the placement should be that much proper that the dead zone area also gets the proper Wi-Fi. There are scanners available with almost all extenders today to know the perfect location.
Setup of Dlink DAP-1620 By using QRS mobile App
There are different ways to setup this extender such as WPS method and manual setup. Here, we will discuss QRS setup for this extender. QRS is a mobile app that can be used to setup various router and extender of Dlink. This app can be downloaded from Google Play store and Apple Appstore
Follow these steps to setup your dlink extender:
- Plugin your adapter into the electrical outlet to turn it on. Wait till power LED starts blinking amber.
- Download the QRS App to your mobile device from the respective Store.
- Connect to the network of your Dlink extender. It will ask for a username and password to connect. Find the credentials on the product label of your extender.
- Open the QRS App and click on the Start button. Select the correct operating mode.
- It will show you a list of the available networks after scanning. Select your Wi-Fi network.
- Enter the WiFi password. In the next step, it will ask you if you want to change the wireless name and password for both of the frequency bands (2.4 GHz and 5 GHz).
- Set up an admin password and click next.
- The summary will be shown to you. Check each and everything. Click on the save button.
The setup is complete. You can now connect your devices such as computer, laptop or tablets to the extender’s network and access internet without any lag.
Management Admin
This is a tab when you open the Dlink extender web interface using the default credentials. In this, you can change the admin password for the configuration of Dlink and make it safe. Nobody will be able to access the configuration page and change your settings. Another can also enable CAPCHTA on this page. Select Admin under the management tab and enter the admin password. Click on save settings.
The extender reboots to make these changes applicable on your extender.
Upgrade
In this tab, you can perform the firmware upgrade and language upgrade. Select upgrade under the management tab. Check for the latest firmware or language upgrade. If any firmware is available, you have to download that from the manufacturer website. Upload it here and save the settings.
Statistics
This page is also under management tab. A user can check details of wireless and network connections. You can set the figures to zero by clicking on the clear. You can check the upload and download speed. Check the upload and download speed coming from your router to the extender.
Get troubleshooting tips for your Dlink DAP-1620
There are cases when you get issues with your extender and you got stuck how to solve the issue. You come at the right place as we have a team who can help you in solving your issue. The issue may be the extender login window is not opening, you forgot the admin password to open the web interface of the extender, you do not know how to reset the extender for factory default settings, you do not know how to upgrade the firmware, how to change the language and admin password and there are much more you can do on the extender.
DLINK DAP 1860
Dlink DAP-1860 is a Wi-Fi extender which has 4 * 4 MU-MIMO technology. You will get a speed of up to 2600 Mbps from its two bands. The 5 GHz band provides a speed of up to 1733 Mbps and from 2.4 GHz a speed of up to 800 Mbps. This Wi-Fi extender is capable of covering your entire home. It can work with any router. The extender directly plugs into an electrical socket and it is double the size of a plug. So, if there is space issue then this extender might be a headache for you. External four antennas are foldable and give maximum coverage.
How to setup Dlink DAP-1860 Wi-Fi extender?
There is WPS setup provided in this extender. But this setup method only works for WPS enabled routers and also for devices. If your router supports WPS method then use this method to connect your extender to the router. If this can’t be possible then download the QRS App on your phone. Connect using the network name of the DAP-1860. The setup wizard opens, follow step by step and get your extender running. While following the steps, you can change the SSID or keep it same. Select Smart connect function, this helps in utilizing the MIMO completely. This technology lets multiple users to surf the internet without any lag.
After setup of the device, you can go for advanced settings. The range extenders are capable of transferring speed to the dead zone they are getting from the router. So, if you are getting a speed of 200 Mbps from your router then you will get a speed of atmost 200 Mbps or even lesser than this because of interference. You can make this extender an access point by connecting an Ethernet cable to its Ethernet port.
If you want to configure the extender using web browser then this can also be possible. We are now providing steps to configure the extender using internet browser.
How to configure DAP-1860 via http://dlinkap.local?
Follow Below Mentioned Steps to Configure D-Link DAP-1860 Extender-
- Plug the DAP 1860 into an electrical outlet near your router.
- Connect DAP to your computer. You can make a wired connection using the Ethernet cable or connect to the network name of the extender by opening the wireless utility on your computer.
- Launch an Internet browser such as Microsoft Internet Explorer or Safari for Mac users. In the location bar, enter dlinkap.local. You can also go for default IP address.
- A login page appears. Enter the password. Default password is blank. The home page of the extender displays that shows the green status mark if the connection of router and extender is successful.
- Start the wizard and choose the language. Scan the list of available networks and connect to the one which you want to extend.
- Enter the password and click next to continue.
- Choose a network name and password for your extender network.
- Enter the admin password. By using this password, a user will be able to get into the web interface of the DAP extender.
- Look at the summary page and click on Finish button to complete the setup.
The setup is now completed. Connect your devices that are in the dead zone to the network of your extender and enjoy internet access.
Troubleshoot DAP-1860 issues
- Unable to connect to the router: TO resolve this issue, make sure your extender is within the range of your wireless router. Place it closer to router and check the LED light for stable connection. You will never get enough speed that you get from your router because there is re-transmission.
- Where to place DAP-1860 extender: The placement of the extender really matters to get good Wi-Fi signal and speed. Use the signal strength indicator to make sure you are getting max signal. To get this, the recommended position is to place it midway between your router and dead zone. But make sure the router signal is reaching there.
- Forgot the admin password to open the web interface: To handle this situation, only solution is reset your extender to factory default settings. Hold the reset button for 10 seconds and then release it. The status light on the extender turns red.
DLINKAP.LOCAL LOGIN / SETUP :
Dlinkap.local redirects you to an IP address 192.168.0.50, dlinkap.local is classic web address to access dlink extender configuration/setup page. To access the dlink extender configuration page, launch a web browser and type dlinkap.local in the address bar of your browser, a login screen will appear, the default password is blank. Dlink extenders are best known these days to eliminate dead zone areas, AC series dlink extenders work on mu-Mimo technology, dlink extenders can be used for seamless wifi connections with host router.
D-link Extender Setup using Dlinkap.local address
Follow the below mentioned steps to Configure Dlink Extender Via Dlinkap.local URL:
- Plug in the range extender close to your existing host router, wait for the lights to turn green
- Open wireless console utility of your computer, select dlink extender network name SSID & then input wifi password, both SSID & network key password can be found on wireless configuration card.
- Launch a web browser and type dlinkap.local in the address bar of your browser, the default username is admin and the login password is blank
- Click on the setup wizard option, under home section.
- Select the manual setup option & then click on the next option.
- Under the list of available wifi access points nearby, select the SSID network name of your host router which you want to uplink with Dlink extender
- Enter the password for your uplink host router, then click on the next option
- Dlink extender will connect to your host router & lights will momentarily flash on your Dlink extender.
- You can change the network name and wifi password for your Dlink extender, the password should be of minimum 8 characters
- Unplug the dlink extender & place it in between the dead zone area at your location and your existing base host router.
DLINK EXTENDER FIRMWARE UPDATE
To update dlink extender firmware , connect your computer wirelessly with Dlink extender , open wireless console utility on your computer , select dlink extender network name , launch a web browser and type dlinkap.local in address bar of your browser , a login screen will appear, use username as admin and leave default password blank under management settings, select firmware option, dlink extender firmware can be updated manually or you can simply click on upgrade option, console utility will check the latest firmware >>automatically download file >> click on next option .
HOW TO CONNECT DLINK EXTENDER WITH NEW ROUTER
If you have changed your host router, your extender will get disconnected, in such cases simply reset the router to factory default and then reconfigure the range extender with the new access point, or router using default website dlinkap.local or IP address 192.168.1.50.
HOW TO RESET EXTENDER TO FACTORY DEFAULTS
METHOD 1: Turn on the Dlink range extender & use a paper clip, press and hold it to reset hole on your extender for 10 seconds, the led lights will flash momentarily, wait for 30 seconds & then reconfigure dlink extender using default web address dlinkap.local or 192.168.1.50
METHOD 2: Login to your Dlink extender & under admin settings .click on management option>> restore to the factory default option, wait for 30 seconds & then try dlinkap.local web address to reconfigure dlink extender with host router.
HOW TO CHANGE SSID OR NETWORK NAME OF DLINK EXTENDER
STEP1: login to your Dlink extender using web address http://dlinkap.local
STEP2: A login screen will appear, the default username is admin & password is blank
STEP3: Under system settings click on extended network option, you can change network name ssid for both 2.4 GHz network as well as for 5 GHz network.
DLINK EXTENDER FEATURES
Seamless Wireless Technology ( http://dlinkap.local )
Best extenders to cover dead zone ( http://dlinkap.local )
5 Ghz Bandwidth ( http://dlinkap.local )
Excellent Speeds up to 867 Mbps ( http://dlinkap.local )
WPS Setup & 1 click configuration ( http://dlinkap.local )
Multi MiMo Technology ( http://dlinkap.local )
Compact & convenient Design ( http://dlinkap.local )
Gigabit ports ( http://dlinkap.local )
DLINK EXTENDERS :
N300 Wi-Fi Range Extender with Power Passthrough
N300 WiFi Range Extender DAP1330 ( http://dlinkap.local )
AC1200 Wi-Fi Range Extender DAP 1620 ( http://dlinkap.local )
Wi-Fi AC750 Dual Band Range Extender ( http://dlinkap.local )
Wireless N300 Range Extender ( http://dlinkap.local )
Wireless dir 505 extenders ( http://dlinkap.local )
D-Link extender DAP 1520 Features
- Easily Extend Your Existing Network
You can easily extend the range of your wireless network by using the D-Link DAP 1520 extender. Moreover, You just have to press a button existed on the extender. You can share your Internet access throughout your home or small office by connecting the DAP-1520 to a router. It is a dual-band extender having 2.4 GHz band and 5 GHz band.
- High-speed Wireless Performance with Wireless 802.11acTechnology
It works on 802.11ac standard wireless technology. Moreover, it provides a speed of up to 750 Mbps with other wireless devices. DAP 1520 Extender is compatible with extenders working on 802.11a/b/g/n. You can easily play online games; do video streaming and real-time audio. All these activities are real-time activities.
Additinal Features:
- Simple Setup
It is easy to set up the extender by using the WPS button. Press the WPS button to connect to the devices that are compatible with WPS. You can also set up the extender using a web-based user interface. Open the web-based user interface in your browser and connect the DAP-1520 to a router. You can easily manage the administrative settings and configure the extended wireless network. You can set up the extender in no time.
- Compatibility
It is compatible with the IEEE 802.11n/g/b/a and also with IEEE draft 802.11ac standards. So, you can easily use your devices with the D-Link DAP-1520.
- Latest Wireless Network Security and Encryption
It supports WPA/WPA2 security. This feature helps to prevent unauthorized access. The unauthorized access can be from the Internet or from the wireless network. By these security methods, you are able to use the best possible encryption methods with your compatible wireless devices.
What is a Wireless Extender?
As the name suggests, extenders are used to extend or increase the range or coverage area of your existing network. It is recommended to use routers when there are dead spots in your home or small office. Dead spots are the areas where there is no reception of the wireless network. The D-Link DAP-1520 re-broadcast the wireless signal so that it can reach the farthest corners of your home or small homes.
You can use the same credentials as your existing network has for the extender. But you can also set up a different network name and password for your extender. You can easily control the network access by doing so.
Setting Up Your DAP-1520
First of all, locate a power outlet and plug in the D-Link DAP-1520 extender. Before following the next step, make sure that the power LED is blinking orange.
Connecting to Your D-Link DAP-1520
The WPS method is the best method to connect to an extender. You just have to press the WPS button till the green LED flash. After releasing the button, activate WPS on your client device. It will connect automatically.
After the connection has been established, you can easily configure your DAP extender by using the web-based configuration in a web browser.
Look at the specification label at the bottom of the extender to find out the Wi-Fi name that is SSID and password for your DAP-1520 extender. Now, connect to the SSID of the Dap-1520 by using the Wi-Fi connection utility of your computer or mobile device. It asks for the password, enters the password. If you do not know how to connect to a wireless network then you can use the user manual to do this or you can also take help from the support team of the D-Link extender. In this case, you can also contact us via our live chat window given on our website.
Configuring Your DAP-1520
You can configure the D-Link DAP 1520 extender in two ways:
1. Using the QRS Mobile app on your Smartphone or tablet device
2. Using the web GUI on your computer
Here, we will discuss the first method in detail.
QRS Mobile App Setup | Dlinkap.local Alternative
Follow the steps given below to use this method to configure your extender:
1. Open the App Store for iOS devices or Google Play for Android devices. Type QRS Mobile in the search field and download the app.
2. Connect to the Wi-Fi network that is displayed on the Wi-Fi Configuration Card included in your package (ex: dlink-a8fa). Then, enter the Wi-Fi password also printed on the Wi-Fi Configuration Card (ex: akbdj19346).
3. Tap on the QRS Mobile icon once your mobile device is connected.
4. To continue, firstly click on Start then on next button.
5. QRS Mobile will first detect your DAP-1520 and then scan for available Wi-Fi networks. Select the network you wish to extend. Enter the password if required.
6. Now, enter the network name and password for the extended 2.4 GHz networks. Click next to continue or enter the network name and password for the extended 5 GHz networks. Click next to continue.
7. For the web-based configuration utility, create an admin password and click next.
8. A summary of your settings will be displayed. Click Save to reboot the device and to complete the setup.
D-Link DAP-X1870
DLink DAP-X1870 is an AX1800 WiFi6 extender that helps in increasing more coverage area of your internet network and can maximize the speed up to 574Mbps + 1200Mbps at 2.4GHz and 5GHz simultaneously. It has one gigabit Ethernet port assisting wired mesh backhaul. Its design is best suited to be plugged easily inside the wall. The setup can be easily done at your fingertips by using your mobile devices for easy installation through it App. The installation can also be done online by browsing Dlinkap.local.
This extender supports advanced parental control feature in which you can apply restriction on the visible websites and configure the data only which you want to be visible to your kids. Both these features can be monitored and controlled at dlinkap.local. You just have to set up your account at dlinkap.local and follow the on screen instructions thereafter you can easily configure all the settings.
This extender is specially designed for smart home to cope your with the future. It helps in increasing the bandwidth ad coverage area so as to provide the lag free connectivity of the internet. Its signal strength can be indicated by a LED light over it. It also helps in eliminating the deadlocks over the network so that you can enjoy seamless video streaming and online gaming without any interruption in each and every part of your home.
Setup using Dlinkap.local
- Plug the extender into a wall outlet that should be placed within the wireless range of your router.
- In your computer or PC open the wireless utility and now select the internet name and write the password corresponding to that network.
- Now open the web browser and in the address bar type Dlinkap.local or you can also use the default IP address 192.168.0.50
- Now fill up the login details.
- Click LOGIN.
- Click Setup Wizard. This will open up the Wi-Fi connection setup wizard. Here click “Next”.
- Now panel will ask you to select Configuration Method.
- Choose the Option “Set up your network manually”. Click “Next”.
- Now a listing will be shown to you to select a wireless network that you want to use as a uplink. Choose DLink and click “Select”.
- Now you will be asked to enter the password of your uplink network. Click Next.
- It will re-broadcast the Wi-Fi connection from the uplink router as an extended Wi-Fi network.
- You can also set these credentials as per your choice and not opting for the default credentials.
- Click Next. If you need any advice or troubleshooting help before or after setup of these settings you can contact us using toll free number or you can chat with us.
- You will now at last be shown all the credentials for your Wi-Fi security settings. This will include Wi-Fi network Name and password, Extended Wi-Fi network name and password for 2.4GHz and Extended Wi-Fi network name and password for 5GHz.
- Now save these settings and use it directly. You can also do this via App and not via Dlinkap.local.